
Cat 5e Wiring Guide: Pinout, Standards, and Cat 7 vs Cat 5 Compared
You’ve just bought a bundle of Ethernet cable and you’re staring at the exposed wire pairs, wondering which color goes where. Whether you’re setting up a home office or running cable through the walls, getting your cat 5e wiring right from the start saves you hours of troubleshooting later. The cat 5 pinout is more than just a diagram — it’s the foundation of a reliable network connection.
Once you understand the cat 5e pinout and how it differs from newer options, the whole process clicks into place. This guide walks you through every wiring standard, color code, and the real differences when comparing cat 7 vs cat 5, so you can make an informed choice for your setup. Keep the cat 5 cable pinout diagrams handy as you work — we’ll cover those too.
Understanding the Cat 5e Pinout and Wiring Standards
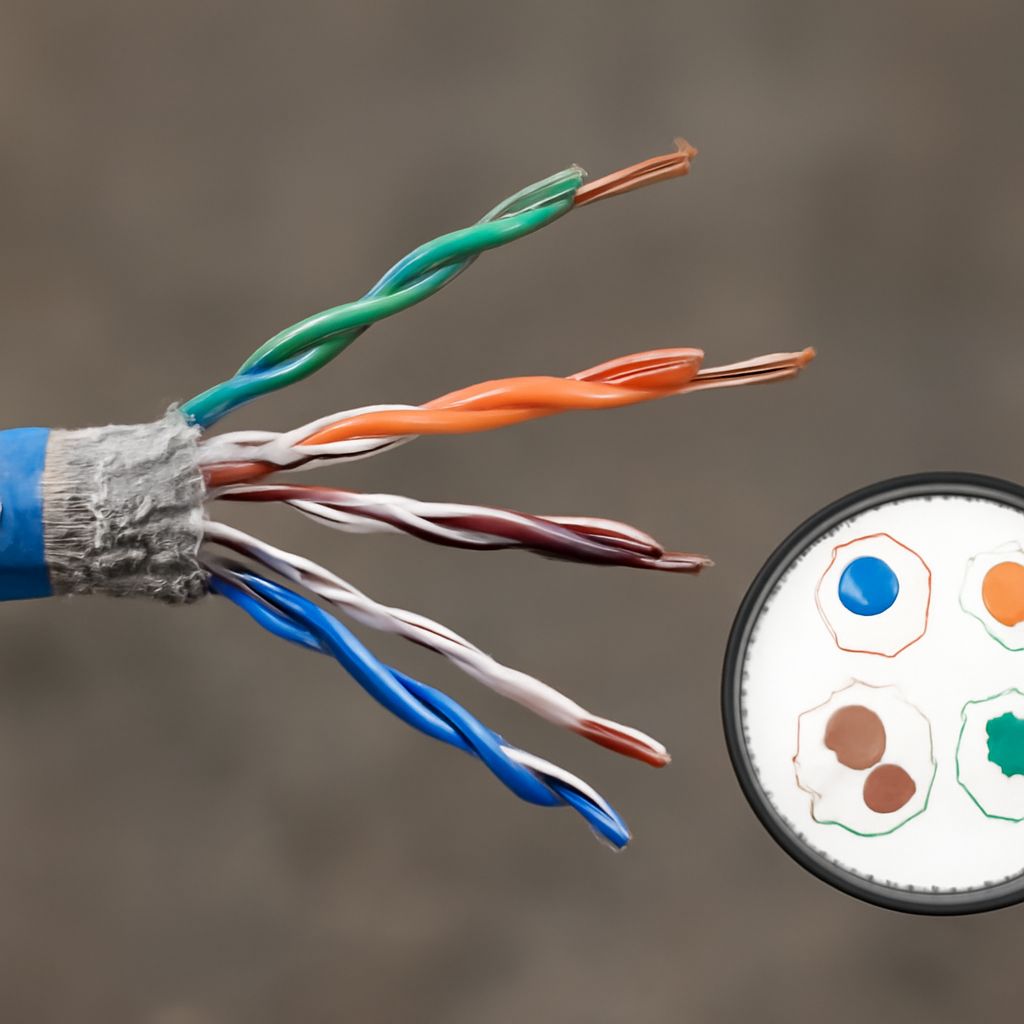
Ethernet cables follow two main wiring standards: T568A and T568B. Both are valid, but T568B is more common in North American home and office installations. The cat 5e pinout assigns each of the eight wires to a specific pin position in the RJ45 connector. Getting this sequence right determines whether data flows cleanly or drops packets constantly.
Here’s the T568B color order you’ll use most often:
- Pin 1: White/Orange
- Pin 2: Orange
- Pin 3: White/Green
- Pin 4: Blue
- Pin 5: White/Blue
- Pin 6: Green
- Pin 7: White/Brown
- Pin 8: Brown
The cat 5e specification supports speeds up to 1 Gbps at 100 MHz over distances up to 100 meters. It uses all four wire pairs, and the pinout keeps transmit and receive pairs separated to reduce crosstalk. When you crimp a connector, press the wires fully to the end of the plug before squeezing — a loose wire at any pin position creates intermittent faults that are hard to diagnose.
Cat 5 Cable Pinout: Straight-Through vs. Crossover
The cat 5 cable pinout comes in two configurations. A straight-through cable uses the same wiring pattern at both ends — this is what you use to connect a computer to a router or switch. A crossover cable swaps the transmit and receive pairs, which used to be necessary for direct device-to-device connections before Auto-MDI/MDIX became standard on modern switches.
For most home and small office setups, you’ll only need straight-through cables. The wiring diagram for a straight-through cable is simple: both ends follow the same T568A or T568B sequence. A crossover reverses pins 1-2 with pins 3-6 at one end. Modern network equipment auto-detects which type it needs, but knowing the difference helps when you’re working with older hardware or patch panels.
One common chewing problem with cables is damaged insulation near the connector. Cats often target the flexible section right where the cable enters the RJ45 plug. Use a strain relief boot or some cable wrap around that section to protect it. A cable with a chewed-through section near a connector can cause the same symptoms as a pinout error — no signal or poor speeds.
Cat 7 vs Cat 5: Which Cable Do You Actually Need?
The cat 7 vs cat 5 comparison comes down to speed, shielding, and real-world need. Cat 7 supports 10 Gbps up to 100 meters at 600 MHz, compared to Cat 5e’s 1 Gbps at 100 MHz. Cat 7 also uses individual shielding around each wire pair plus an outer shield, which cuts down interference significantly in electrically noisy environments.
That said, most home networks don’t need Cat 7. Your internet connection is almost certainly slower than 1 Gbps, which means Cat 5e handles everything you throw at it. Cat 7 costs more, the connectors are bulkier, and the cable is stiffer and harder to route through tight spaces. For a NAS-to-switch connection where you want to max out local transfer speeds, Cat 6 or Cat 6A is usually the better middle ground.
Where Cat 7 makes sense: data centers, high-density commercial installations, or setups where EMI from electrical equipment is a real concern. The shielding in Cat 7 genuinely helps in those environments. For a home with standard routers and a few network devices, upgrading to Cat 7 from Cat 5e won’t produce any measurable difference in day-to-day performance.
Practical Tips for Getting Your Wiring Right
Strip only about 1.25 cm of the outer jacket — too much exposed untwisted wire increases crosstalk. Keep the wire pairs twisted as close to the connector as possible. Use a proper crimping tool with the correct die for RJ45 connectors, and test each cable with a cable tester before routing it through walls or concealing it under carpet.
Label both ends of every cable immediately after crimping. A label maker or even a piece of masking tape with a marker saves enormous time when troubleshooting later. Document which ports connect where. This basic step is the single most overlooked part of any wiring job.
Safety recap: Always de-energize PoE switches before working on connected cables. Wear eye protection when using a cable punch-down tool on patch panels — wire fragments can fly. Keep cables away from high-voltage lines to reduce interference and potential fire hazards.